Yellow Teeth? Fix Them With These Amazingly Easy Photoshop Steps
Sarah Corley#Tutorials

Learn how to use Photoshop to edit photos and make teeth appealingly white!
I remember the first time I whitened someone’s teeth. No, I’m not a dentist, hygienist, or even a Crest Whitening Strip expert. In fact, I’m a huge advocate for keeping teeth naturally white, but sometimes smiles can come across a bit yellow in photos. Stick with me, and I’ll show you a quick and easy way to whiten teeth using Adobe Photoshop. This is a great way to touch up those company headshots.
Step 1: Open your photo in Photoshop.

Step 2: Unlock the background and add a new layer.
Click on the lock icon in the bottom right corner to unlock editing capabilities.
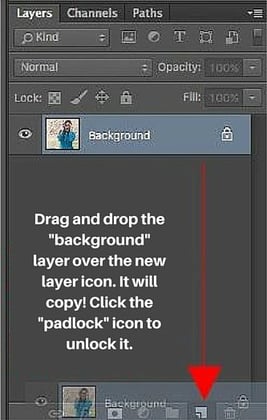
Step 3. Make a copy of that layer and rename it.
I recommend naming the first layer “original” and the top layer “whitened.” This way, you have the original to go back to, in case something should happen.
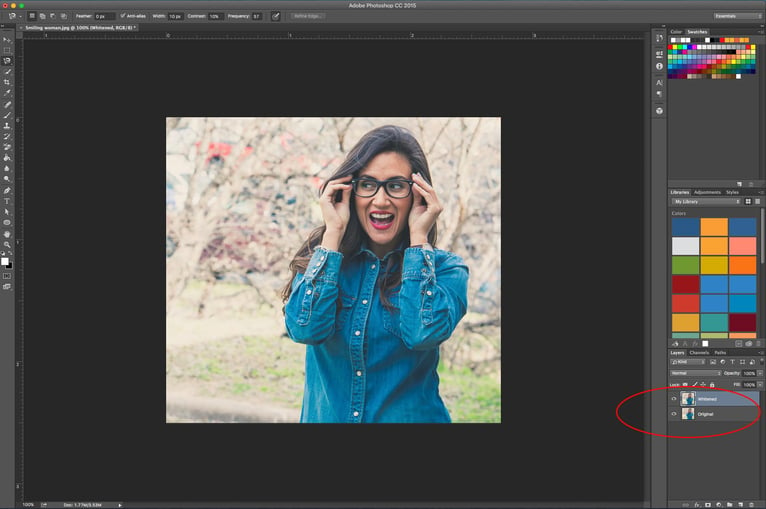
Step 4: Zoom into your photo.
Make sure you are on the “whitened” tab, and then choose to use the magnetic lasso tool.
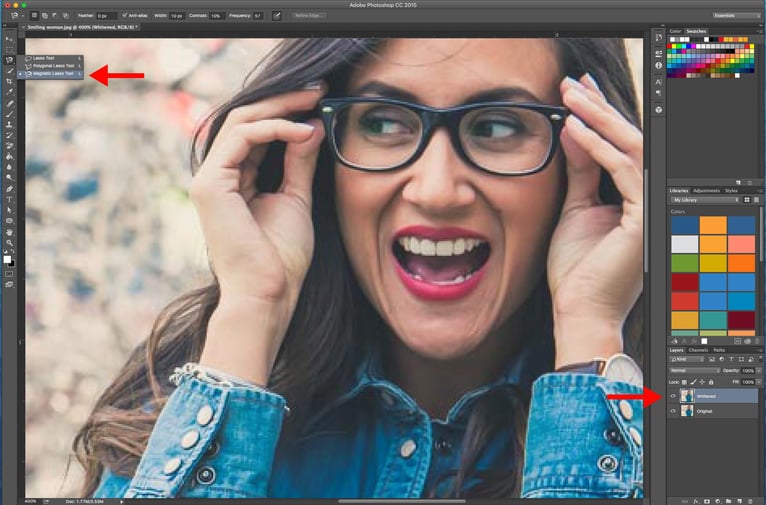
Step 5: Draw an outline around the area you wish to modify.
Carefully follow along the edges of the teeth. Don’t include the gums!
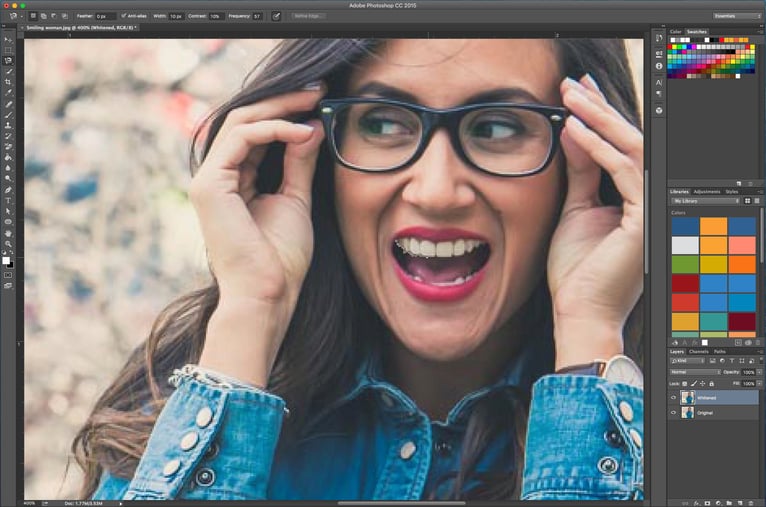
Step 5.5
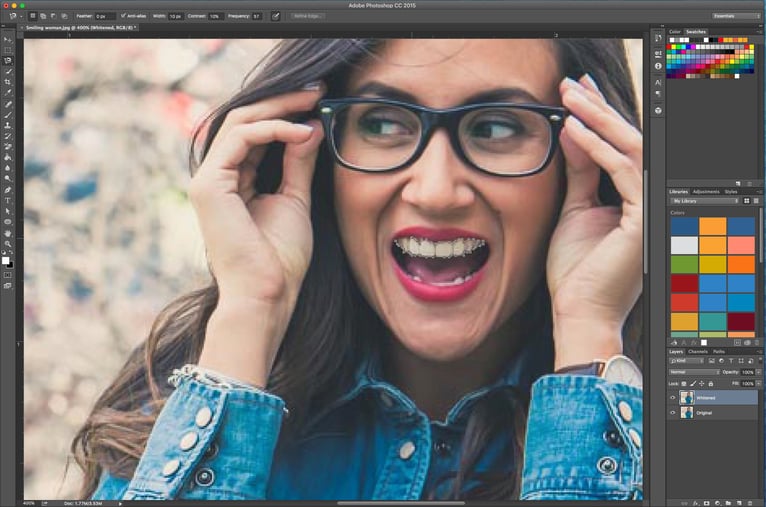
Step 6: Once you have the whole teeth area “lassoed,” close the lasso by clicking on the first selection.
Your path should look like moving ants encircling your current selection, which in this case is the teeth!
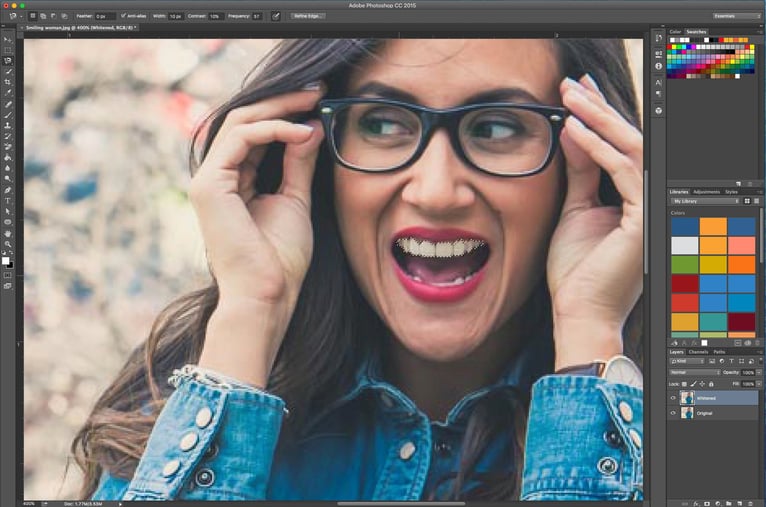
Step 7: Open the Curves Tool.
The curves adjustment tool is a great way to adjust the tonal ranges of your images.
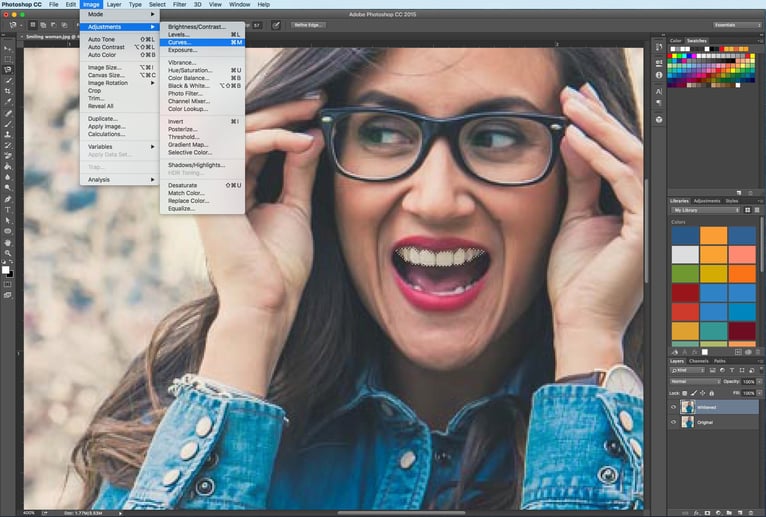
Step 8: Select the channel.
In the “Channel” drop down, if the image is RGB, you’ll want to choose the Blue option. If your image is CMYK, you’ll want to adjust the Y selection.
As you add control points or move the diagonal line in the Curves box, the image will adjust accordingly. We won’t be moving the actual line, just the top right box, called the “White Point.” Since we have the teeth selected/outlined, the changes we make to the white point will only affect the selection!
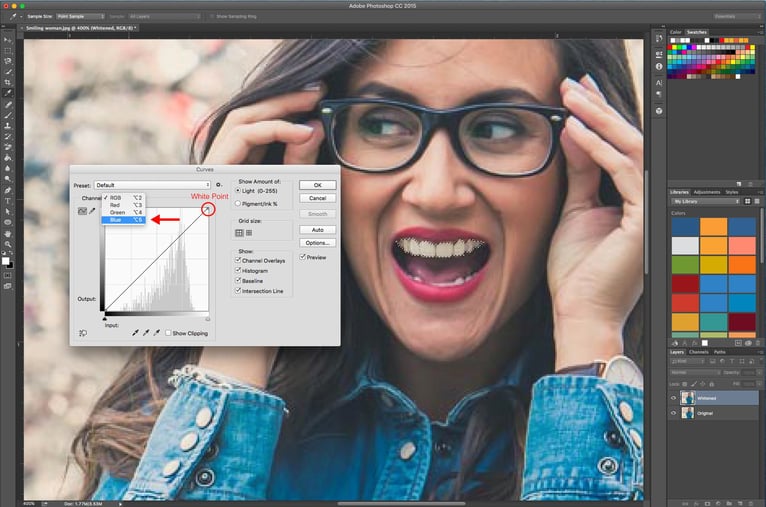
Step 9: Adjust the White Point.
As we move the “White Point” further down, you can see the teeth become more yellow. So we definitely don’t want to go down! In contrast, when we move the white point further left, the teeth become very blue.
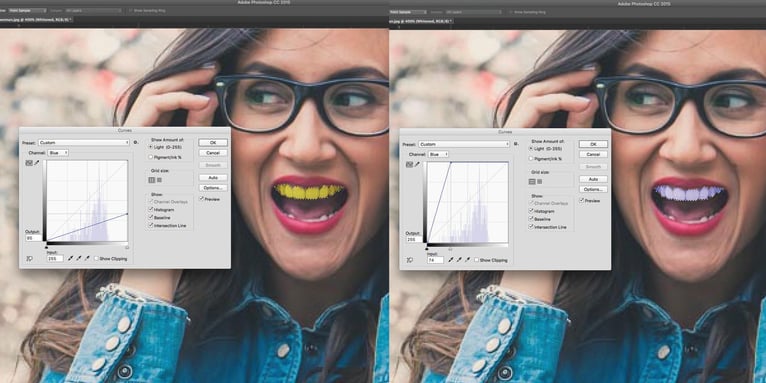
Step 10: Choose a white point that looks good to you.
Remember, you want to maintain the integrity of the photo. The person in your photo definitely doesn’t need blueish teeth or teeth that are so white that they look fake. They just need to be a teensy bit whiter than they currently appear.
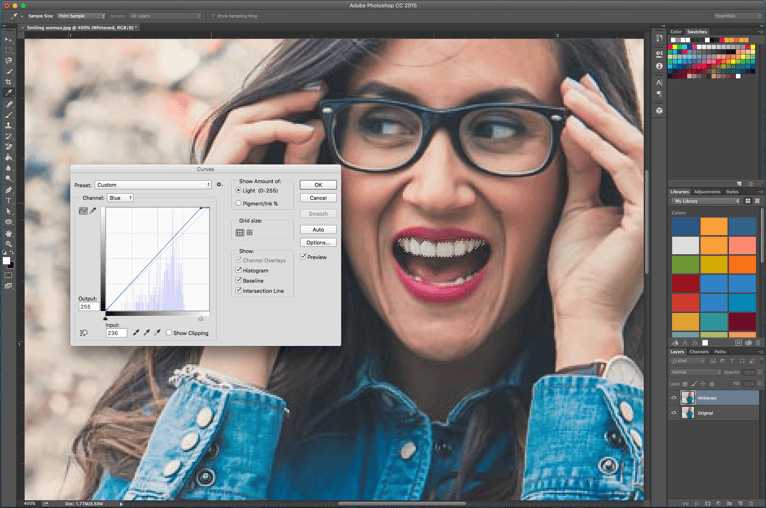
And there you have it! Here’s a look at how our change improved the picture:

This is just one of many ways to whiten teeth in Photoshop. So whether you try it my way or find another method, one thing is for sure: whitening the teeth in your company headshots or newsletter pictures can take them from drab to fab!
If you have any questions about Photoshop or tips of your own, please feel free to share them in the comments below. We’d love to hear from you!
Related Posts

Is Threads the Next Twitter?
As Threads gains more market share, will it overtake Twitter?

Alternatives to Twitter
We have identified some potential alternatives to Twitter that we believe are useful for marketers to spread their message and brand.
Results Matter.
We design creative digital solutions that grow your business, strengthen your brand and engage your audience. Our team blends creativity with insights, analytics and technology to deliver beauty, function, accessibility and most of all, ROI. Do you have a project you want to discuss?
Like what you read?
Subscribe to our blog "Diagram Views" for the latest trends in web design, inbound marketing and mobile strategy.
