Setting Up SSL in the HubSpot Website Platform
Matt Brady#Tutorials, #HubSpot

We offer step by step instructions for setting up SSL for your HubSpot website, which will provide security for your users and boost your SEO.
Website security is important. That’s a pretty obvious statement, but it’s worth stating, since many major businesses and even government organizations regularly experience issues with data breaches. In order to protect your data and that of your customers, it’s important to use HTTPS to secure your site. In fact, this security is so important that Google has added it as a ranking signal that affects how sites appear in Google search results.
If you’re looking to implement HTTPS on your website, you’ll want to obtain a SSL (Secure Sockets Layer) certificate, and you’ll probably need some help from your webmaster to get it set up. However, if you utilize HubSpot’s Website Platform, they’ve made the process simple, and you can even implement SSL at no additional cost. Here are step by step instructions for setting it up:
Request Access
First, you’ll need to request access to SSL for your HubSpot site(s). To do so, contact your Customer Success Manager.
Update Your Settings in Domain Manager
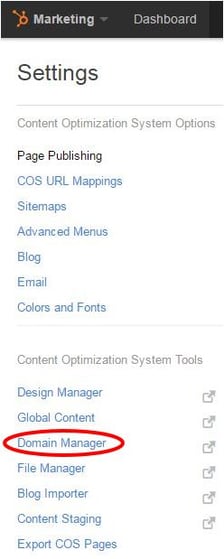
When you’re logged in to HubSpot, navigate to Content/Content Settings, then select Domain Manager from the menu in the left sidebar:
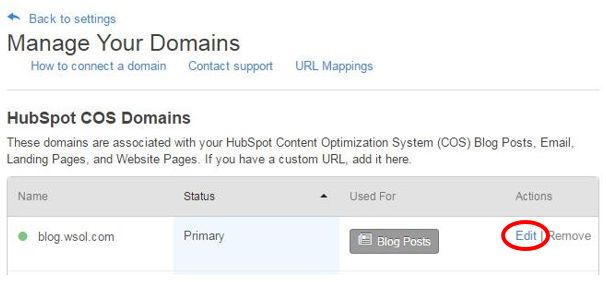
Determine which domain you want to enable SSL for and click Edit next to that domain:
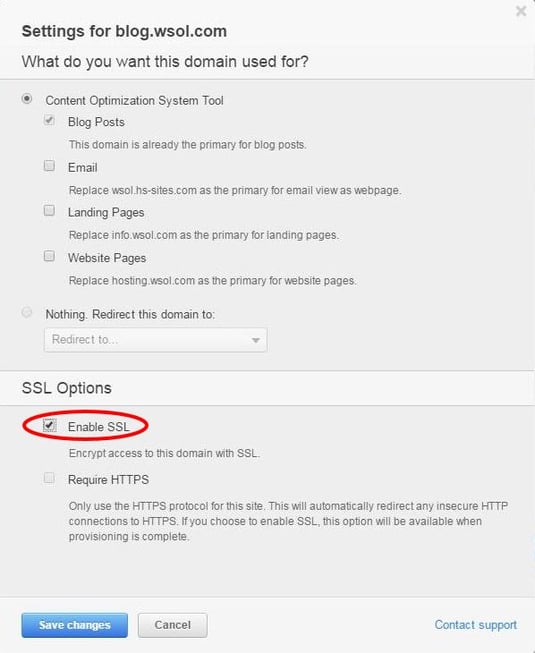
In the window that pops up, select the checkbox next to Enable SSL. If you want to make your site available only using HTTPS, select the checkbox next to Require SSL. When this option is activated, all traffic to this domain will be redirected to use a secure connection. Click Save Changes to activate SSL.
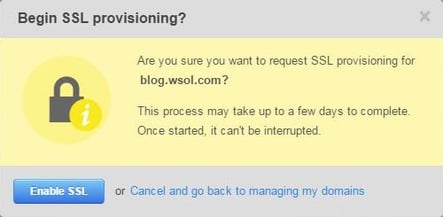
You will then see a confirmation message asking whether you are sure you want to begin the SSL provisioning process. Click Enable SSL to continue:
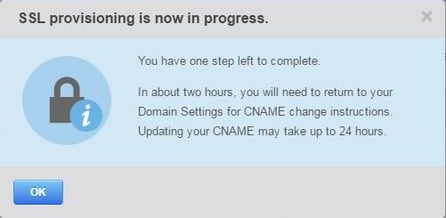
Another confirmation message will be displayed, letting you know that the process has begun. Click OK to continue:
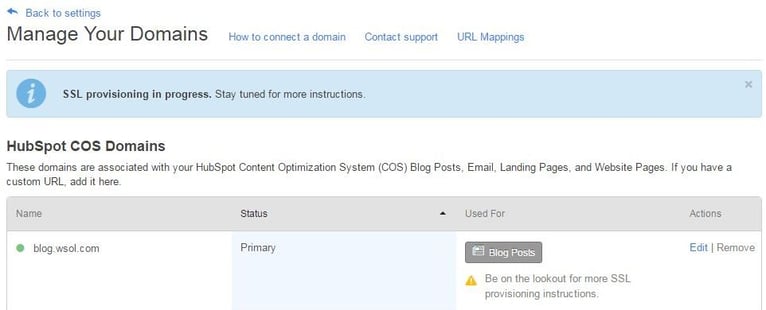
Domain Manager will now show that SSL provisioning in is process for your domain, and a message will display next to your domain saying “Be on the lookout for more SSL provisioning instructions”:
Update DNS Settings
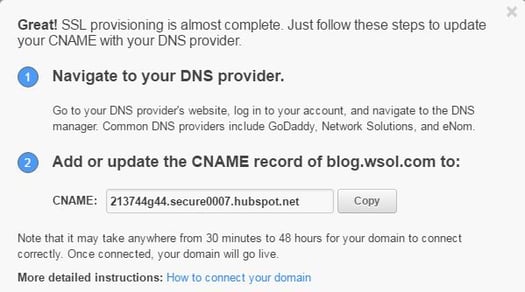
Within the next 24 hours after enabling SSL, you will receive an email from HubSpot with further instructions. If you return to Domain Manager, you will see a message letting you know that you need to update the CNAME for your selected domain in your DNS settings:
If you have any questions about how to update your DNS settings, HubSpot has provided a guide to doing so.
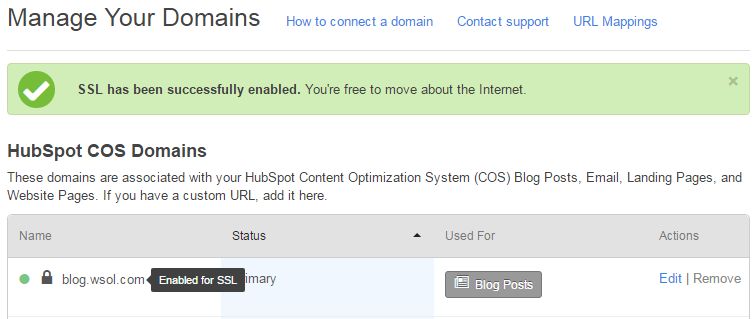
Updates to DNS records usually take 24-48 hours to propagate across the web. Once SSL has been enabled, you will receive another email from HubSpot confirming that your site is now secure. You can also check the status of SSL provisioning in Domain Manager; after SSL has been enabled, you will see a confirmation message:
So there you have it! Activating SSL in HubSpot is a simple, straightforward process, and doing so will ensure that your users can be confident that any data they share with you will be secure. If you have any questions about SSL or want to know more about the benefits of HubSpot’s Website Platform or any of their other products, please contact us, and we’ll work with you to help you use these tools to bring success to your digital strategy!
Related Posts
5 Tips for Quality Assurance ROI
ROI for software quality assurance can be improved exponentially if you follow our five steps. Click to read more.
/Icons/blog-011524-min.png)
How to Keep Up With Digital Transformation
These 7 steps to building a digital transformation strategy will help your organization thrive in today’s fast-paced and technology-driven world.
Results Matter.
We design creative digital solutions that grow your business, strengthen your brand and engage your audience. Our team blends creativity with insights, analytics and technology to deliver beauty, function, accessibility and most of all, ROI. Do you have a project you want to discuss?
Like what you read?
Subscribe to our blog "Diagram Views" for the latest trends in web design, inbound marketing and mobile strategy.
